Case Upload
Single Case Upload
To upload a single case (i.e. all documents are related to one patient), press the ‘Submit Single Case’ button in the column on the left. A single case can have a few different source document files.
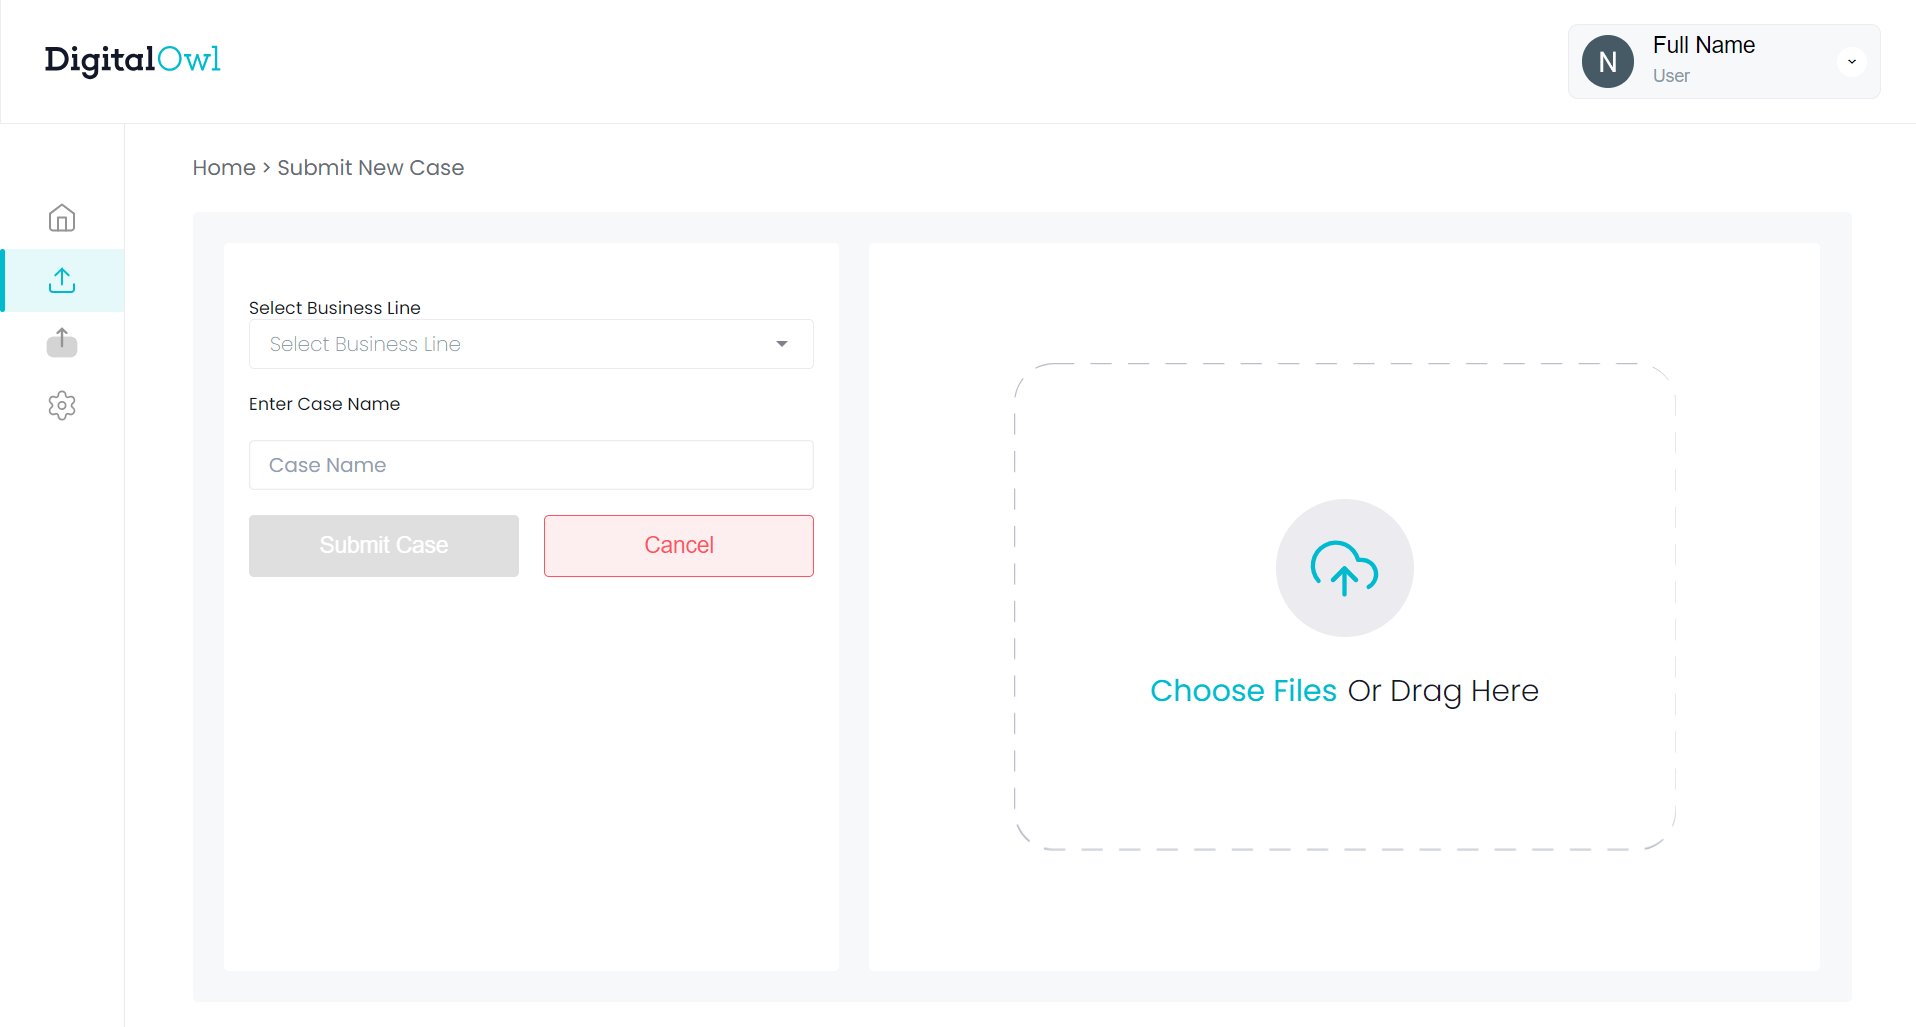
On the left half of the screen, select a business line from the available list and enter the name of the case. We recommend that you choose a name that will provide you the required context and which you will be able to search for in the case list using the search functionality.
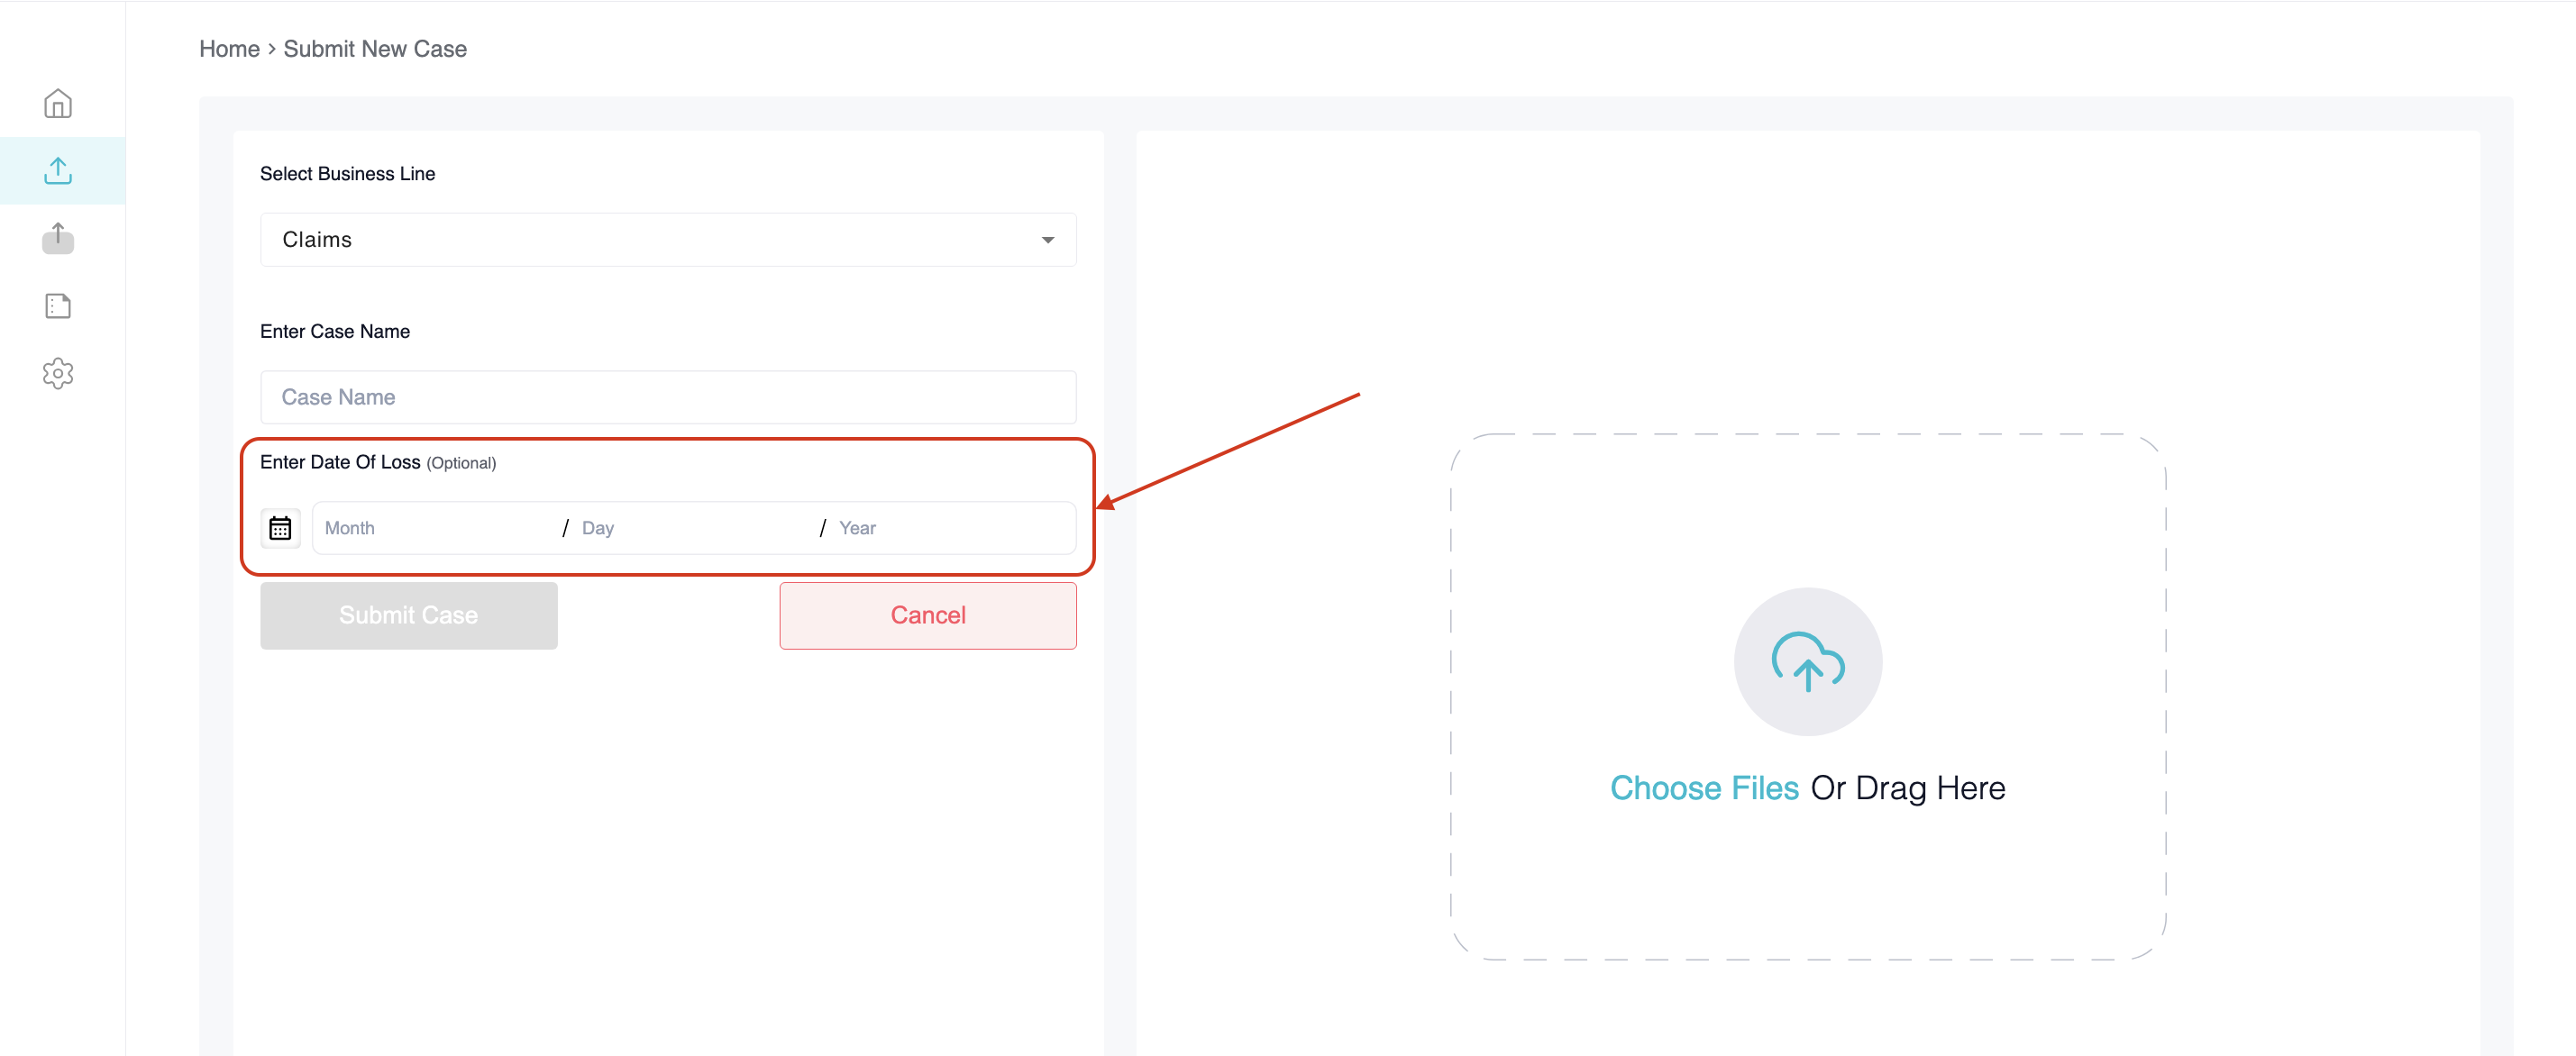
You will be able to add a Reference Date (Date of Loss/Incident). This date will be added into the summary as a decision date allowing to present impairments/conditions/events as ones that existed prior to the date of loss or that started after the date.
On the right half of the screen, drag or select the source document files of the case that you want to upload to the portal. Each case can include multiple files. Supported file formats include PDF, TIFF, PNG, and JPEG.
To start the upload process, press the "Submit Case" button.
NOTE
Make sure to leave the page/tab open until the upload is complete.
Bulk Case Upload
To upload multiple cases at the same time, press the "Upload Bulk Cases" button in the column to the left.
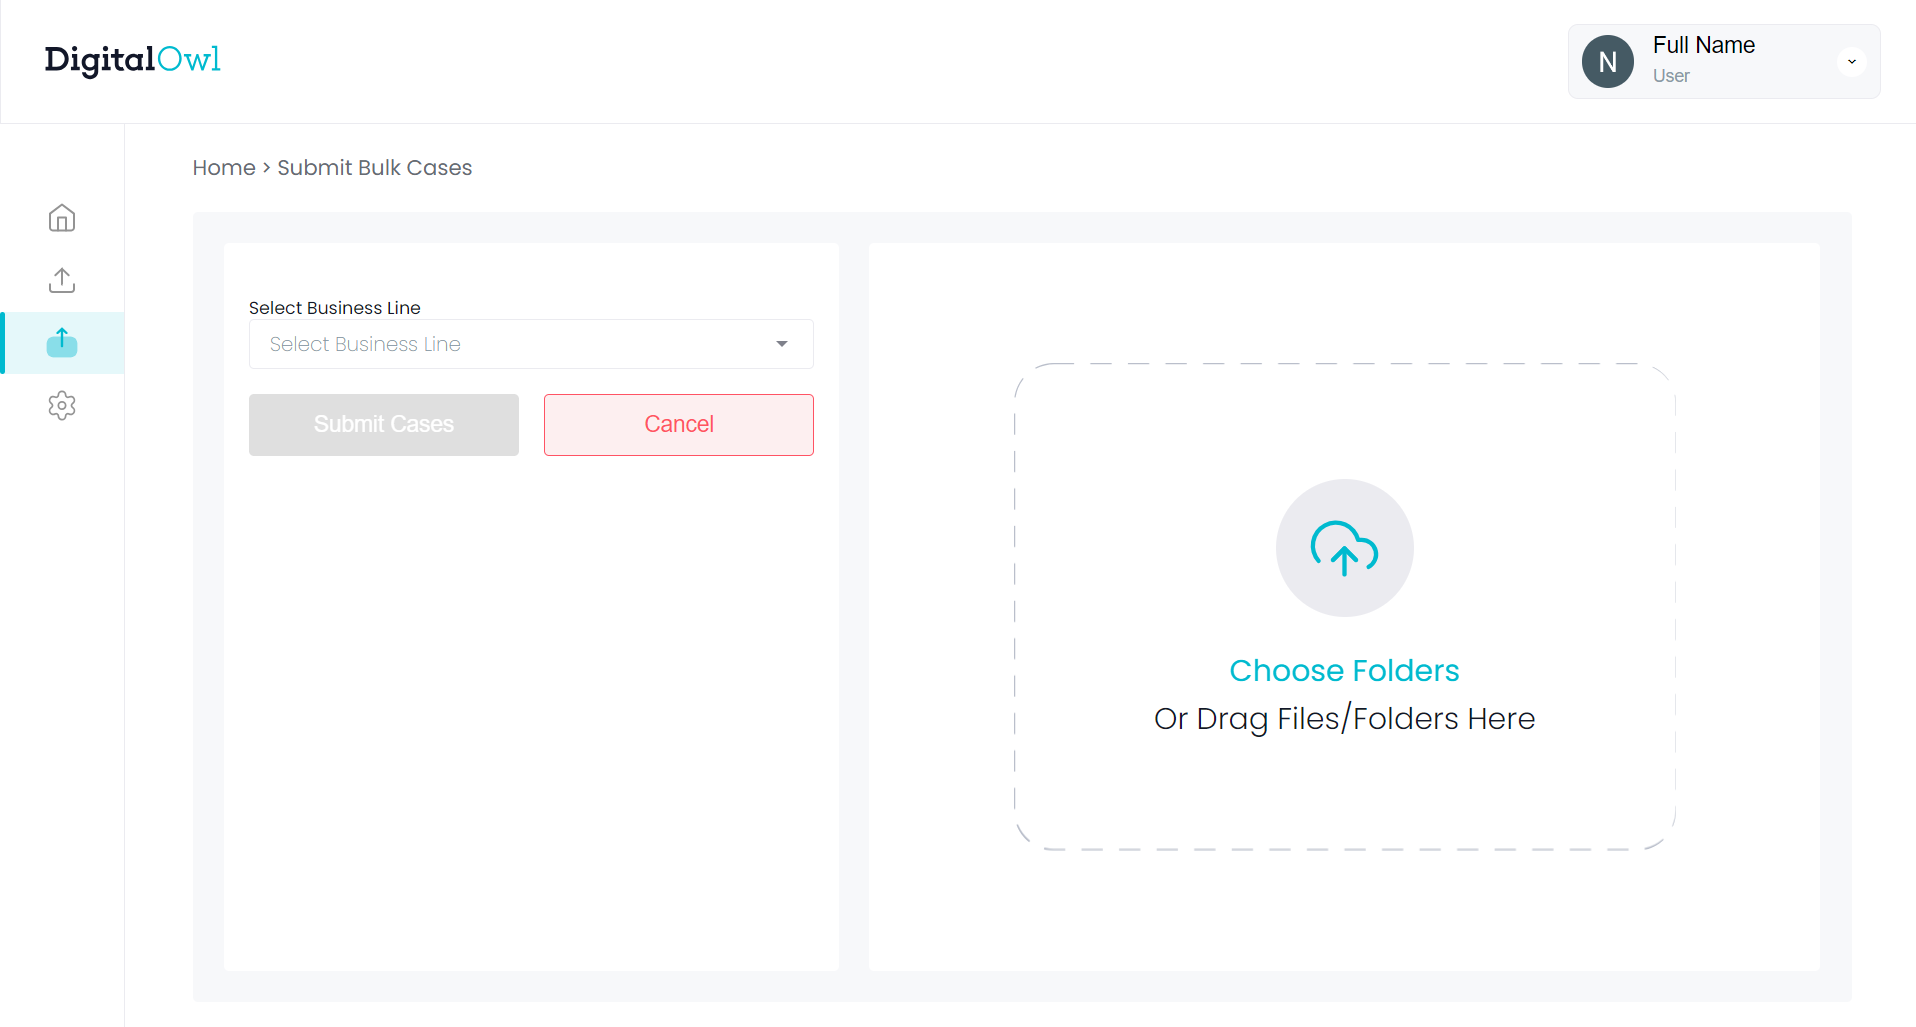
On the left half of this screen, select a business line:
- If you are uploading multiple cases, where each case is one file, please drag the files into the upload area. Each file will be processed as a separate case.
- If you are uploading cases that have more than one file each - make sure to put all the relevant files within a folder beforehand. Use the "Choose Folders" option or drag the folders into the the right half of the screen. Remember, each folder will be associated with a new case.
NOTE
Any folder placed within the right side of the screen will be processed as one case. Do not place all files for multiple cases in the same folder and place it here as it will create a case that has the medical chronologies of all the source documents together.
You will have the option to add a reference date (i.e. date of loss/incident/application/etc.) for each of the cases prior to submitting the cases for uploading.
To start the upload process, press the "Submit Cases" button. Please make sure to leave the page open until the upload is complete.
NOTE
When uploading cases from your computer, please ensure that the cases are organized into folders, as file uploading is not supported (files can only be dragged into the upload area).
Updated 8 months ago